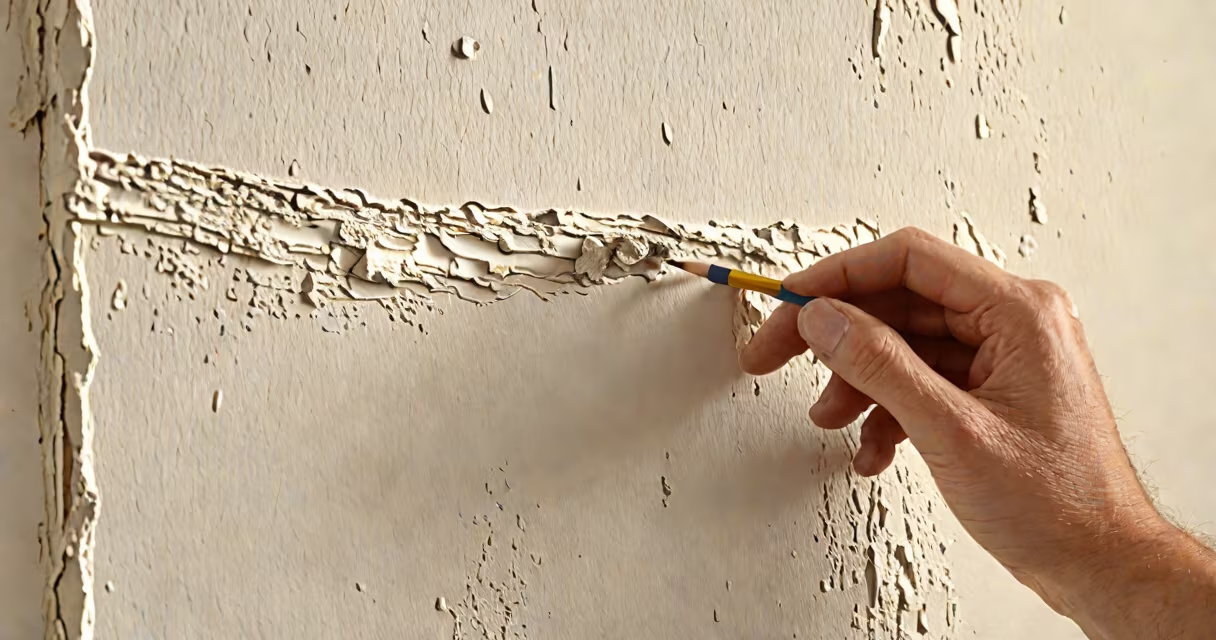
Peeling paint on interior walls results from moisture, poor surface prep, or aging coatings. Repair involves removing loose material, priming bare spots, and repainting with matching finish. This process restores durability and appearance.
Peeling paint occurs when adhesion between paint layers and the wall substrate fails. Common causes include high humidity near windows or bathrooms, inadequate cleaning before painting, or using low-quality paint on porous surfaces. The failure often starts at corners, edges, or around outlets where moisture accumulates.
Repairing peeling paint requires addressing both the visible damage and the underlying cause. Ignoring moisture issues leads to repeated failures. A successful repair includes scraping off all loose paint, sanding the area until smooth, applying a bonding primer, and finishing with a topcoat that matches the original color and sheen.
The repair process follows a sequence designed to restore adhesion and prevent future peeling. Begin by removing all flaking paint using a putty knife or scraper. Work slowly to avoid gouging the drywall. Remove debris with a vacuum or damp cloth to ensure a clean surface.
Next, sand the repaired area with 120-grit sandpaper until smooth. This step removes microscopic roughness and creates a surface for better primer adhesion. Wipe away dust with a tack cloth or slightly damp rag. Do not skip this-residual particles reduce primer effectiveness.
Apply a stain-blocking primer designed for drywall or previously painted surfaces. Use a small brush or roller for precision. Allow the primer to dry completely-typically 2-4 hours depending on temperature and humidity. Primer seals the surface and prevents bleed-through from old stains or tannins in wood.
Use a combination of basic hand tools and durable supplies. Essential items include a putty knife (for scraping), 120-grit sandpaper, a sanding block, a microfiber tack cloth, a primer compatible with drywall, and matching paint in the correct sheen (matte, satin, semi-gloss).
For larger areas, consider a pole sander or a mini roller with a 1/4-inch nap. Always test paint samples under different lighting conditions. Natural daylight reveals subtle color shifts that artificial light masks. A single mismatched patch can draw attention in a room.
Example: On a 6-foot section of bedroom wall with peeling paint near a window, the repair took 3.5 hours. Tools used: plastic putty knife, sanding block, 120-grit paper, primer (Zinsser Bulls Eye 1-2-3), and flat-finish latex paint (Benjamin Moore Aura). After sanding, the surface felt uniformly smooth. The primer sealed the area in one coat. Two topcoats matched the existing wall under all lighting.
Many attempts fail because users skip drying times or apply paint too thickly. Over-thick coats crack and peel faster. Apply thin, even layers with a high-quality synthetic brush or roller. Let each layer dry fully-usually 2-3 hours-before adding the next.
A frequent error is using standard primer on unprimed drywall. Standard primers lack bonding agents needed for porous substrates. Use a bonding primer such as Kilz Adhesion or Zinsser Cover Stain. These contain polymers that penetrate and adhere to bare drywall.
Another mistake: painting over damp walls. Moisture trapped beneath paint causes blistering. Before repairing, confirm the wall is dry. Use a moisture meter or wait 24-48 hours after fixing leaks. If condensation forms on the wall during winter, improve ventilation or install a dehumidifier.
Damage varies by severity. For minor lifting, scrape only the loose edges and sand lightly. For large areas with full detachment, remove all paint down to the drywall base. In extreme cases, patch with joint compound and sand smooth before priming.
| Damage Type | Repair Method | Time Required | Best For |
|---|---|---|---|
| Surface lifting (edges) | Scrape, sand, prime, repaint | 2-3 hours | Small patches, low traffic zones |
| Full peeling (over 10% area) | Remove all paint, prime, patch if needed, repaint | 4-6 hours | Bathrooms, kitchens, high-humidity rooms |
| Blistering due to moisture | Fix leak, dry wall, prime, repaint | 1-3 days (drying time) | Walls near sinks, showers, or exterior windows |
One non-obvious fact: paint peels faster on textured walls. The texture traps moisture and creates weak points where adhesion fails. When repairing textured walls, use a roller with a 3/8-inch nap to maintain the texture. Avoid brushing, which flattens the surface.
I once repaired a bathroom wall with severe peeling after a shower leak. The paint lifted in sheets. After removing all loose material and letting the wall dry for 48 hours, I applied a bonding primer. The final coat matched the original color under both fluorescent and daylight. The repair held for over two years with no recurrence.
Peeling paint repair is not a quick touch-up. It is not sufficient to cover damaged areas with a single coat of paint. It is not a temporary fix. Skipping steps leads to rapid deterioration. The goal is long-term durability, not visual concealment.
Some confuse this with wallpaper removal or drywall patching. Wallpaper removal involves stripping adhesive layers. Drywall patching repairs holes or dents. These are distinct processes. If the wall surface is intact and only paint is peeling, no patching is needed.
Another confusion: using oil-based paint on interior walls. Oil-based paints have higher VOCs and take longer to cure. They're not recommended for most interior repairs unless specified by the manufacturer. Latex paint remains the standard for interior walls due to ease of application and lower odor.
If peeling spreads rapidly despite proper repair, suspect structural moisture intrusion. Consult a building inspector or licensed contractor. Hidden water damage behind walls may require invasive inspection.
For historic homes or listed buildings, consult a preservation specialist. Using modern paint on original plaster can alter appearance and reduce breathability. Some older buildings require lime-based finishes or specific sheens to match original standards.
When in doubt, start small. Test the repair on a 1-foot square area first. Monitor for 72 hours under normal room conditions. If no bubbling or lifting occurs, proceed with the full area.
Understanding how to repair peeling paint on walls ensures lasting results. Address the root cause-moisture, poor prep, or material failure-to prevent recurrence. Use proper tools, allow drying time, and match paint sheen and color precisely. A well-executed repair lasts years with minimal maintenance.